Monday 27 June 2016

Eid July 2016 Make-Up Look - Green Gold Smokey Eyes

Hello Lovelies...

Whenever I think of muslim girls, two things that instantly come to my mind are beautiful eye make-up and flawless skin <3. So, today's make-up look is definitely inspired by you beautiful muslim girls as it is an Eid make-up tutorial. I hope it goes well and you ladies like it :). If you like the picture below, then keep on reading :*


PROCEDURE

STEP 1 - I applied MAC Strobe Cream to my freshly cleansed face to give a nice glowy & healthy look to my face and Origins Eye Cream to hydrate my under eye area as well. 

STEP 2 - I used Smashbox Photo Finish Foundation Primer all over my face to make a smooth base for the make-up.

STEP 3 - Taking MAC Studio Finish Concealer in the shade NW35, I used it as a corrector and applied on my dark circles and around my lips to hide the darkness using my finger.

STEP 4 - Next, I applied Mac Studio Fix Fluid Foundation in the shade NC37 (it was a gift so the color was not a perfect match for me) all over my face and and neck with the help of Real Techniques Expert Face Brush.

STEP 5 - Then I started doing eye make-up. First, I primed my eyes using NARS Radiant Creamy Concealer in shade Ginger (from lids to brows) and set the area with a face powder. 
Then, I took Golden colored eye shadow from Lakme 9 to 5 Eye Color Quartet in Tanjore Rush (click here for the review) and applied it all over my lid area.


Next, I applied dark green color from Studio West Maya Crystal Eye Shadow in Bombay Jewels on the inner and outer corners of my eye lids.


Then, taking a light brown eye shadow on my blending brush, I blended the crease area very well so that all the eye shadows get a smooth  finish.


I kept on applying and blending the colors till I got the proper color intensity.

On my lower lash line, I applied dark green color on the inner & outer corners and in the center, I applied the same golden color. I smudged the dark color using smudge brush.

STEP 6 - Next, I made a winged eye liner using Bobbi Brown Gel Liner in the shade Black Ink and applied the same on my lower waterline. Then, I applied my Rimmel London Scandaleyes Show Off Mascara on both upper and lower lashes to give them a nice volume. And last, I applied a light shimmery color on the inner corners of my eyes to make them pop.

STEP 7 - I did my eye brows using Maybelline Master Brow Pro Palette in Deep Brown.

STEP 8 - I used NARS Radiant Creamy Concealer in the shade Ginger under my eyes, center of my forehead, bridge of my nose, cupid's bow and center of my chin to highlight those areas. I blended it well using a damp Real Techniques Miracle Sponge.

STEP 9 - After that, I applied Benefit High Beam Liquid Highlighter on the same areas where I applied the concealer in the above step, except the under eye area. In this step, I applied it just on my cheek bones. I blended it well taking the same damp sponge.


This step gave me a beautiful dewy finish on my face.

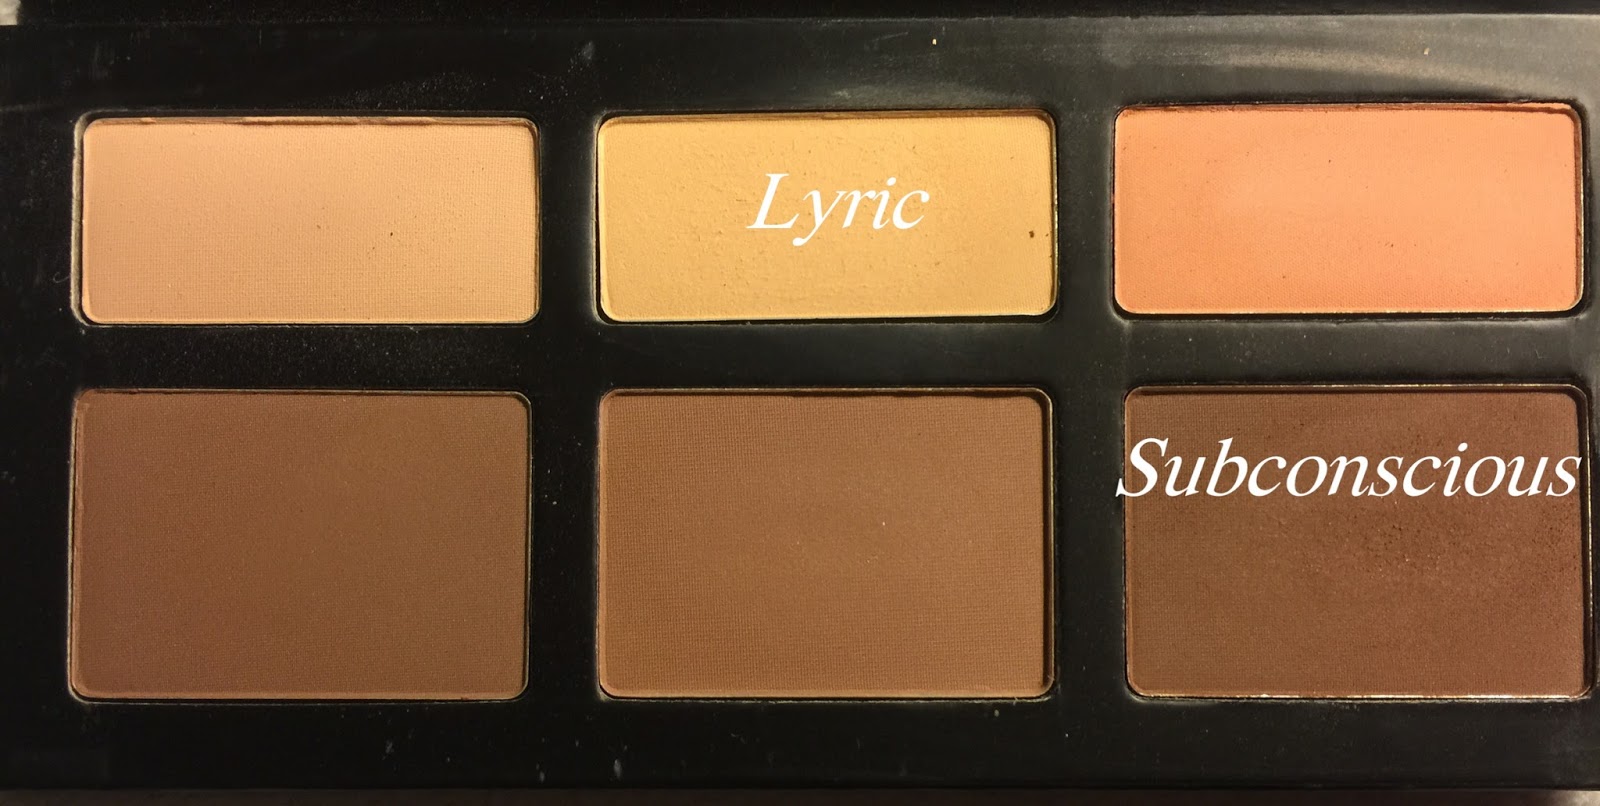
STEP 10 - Then, I set my under eye area using Lyric from KAT VON D Shade + Light Contour Palette and also contoured my face  with the shade Subconscious from the same palette. I contoured my cheeks, nose, forehead and jawline.


STEP 11 - For blush, I used Maybelline Master Hi-Light Blush in the shade Pink Rose which is a 2 in 1 product as it has blush as well as highlighter in it. 

STEP 12 - Coming to the lips, I first applied Lakme Absolute Matte Lip Color in Pink Brick and on top of that NYX Soft Matte Lip Cream in Antwerp. 

And with this, the whole look is complete. Some more pics for you all ;)


I hope I did justice to the Eid Make-up Look and this Hijab. Personally, I loved the glowy, healthy looking finish I got in this look. How did you guys find this look? Do tell me in the comment section :). See you all in my next post :*

With Love
Akanksha


Saturday 25 June 2016

Pink Purple Eyes & Pink Lips Make-Up Look

Hello Gorgeous Ladies...

It's Saturday!!! Time to put on our pretty dresses and have some fun tonight. And to complete the look, we are going to do some make-up also ;). Today's  look is perfect to go with our Little Black dress <3 or white or even purple/pink. Now, you just see the pic and decide for yourselves :p


I am going to give you detail on my eye make-up but will write down the products for the whole look. So, if you are interested then keep on reading :)


TUTORIAL

Primer - Smashbox Photo Finish Foundation Primer

Corrector - L.A. Girl Pro Conceal HD High Definition Concealer in the shade Orange Corrector ( click here to check out my post on correctors and dark spots)

Foundation - Estee Lauder Double Wear Stay-in-Place Makeup in the shade 3W1 Tawny 

Concealer - NARS Radiant Creamy Concealer in the shade Medium 2 Ginger. Click here to check how I highlight using the concealer)

Face Powder - MAC Select Sheer Pressed Powder in the shade NC25

Contour Palette - KAT VON D Shade + Light Contour Palette (Shade used to contour - Subconscious and to highlight - Lyric). Click here to check how I contour my face.


Brows - Maybelline Master Brow Pro Palette in the shade Deep Brown

Cheeks - Estee Lauder Deluxe All-Over Face Compact (Bronzer - Bronze Goddess Medium 02 and Blush - A mix of Peach Passion & Lover's Blush)


Lips - MAC Girl About Town Lipstick

Coming to the eyes now - Step 1 - I applied concealer all over the eyes (from lash line till brows) as an eye shadow primer to make the eye makeup last longer. I used eye shadows from my Too Faced Chocolate Bon Bons Eye Shadow Palette for this look.


Step 2 - Then, I applied the shade Divinity, on the same area of my eyes where the concealer in the above step was applied.

Step 3 - Next, I took the color Black Current and applied it onto inner and outer corners of the eyes and also smudged it into lower lash line.

Step 4 - I pressed Totally Fetch onto center of the lid.

Step 5 - Then, I blended the crease area and the area little above it with Almond Truffle to give a smooth finish to the eyes.

Step 6 - I dabbed Divinity onto inner corner of the eyes to make them pop.

Step 7 - Next, I applied Bobbi Brown Gel Eyeliner in the shade Black on my upper lash line and lower waterline. 

Step 8 - I applied Rimmel London Scandaleyes Show Off Mascara on my upper and lower lashes followed by applying fake eye lashes.

And with this, the make-up is done. I really liked the colorful outcome on my eyes :). 


Hope you all like this look too :*. Share your thoughts in the comment section below. See you guys in my next post :)

With Love
Akanksha


Tuesday 21 June 2016

Rimmel London Scandaleyes Show Off Mascara Review

Hello Beautiful Ladies...

I had been using two mascaras for a very long time (Estee lauder & Loreal Paris) and was thinking to buy a new one from India but didn't make it to do that. When I came back to Perth, my husband told me that some boxes got delivered for me when I was in India. They were my monthly subscription boxes from Bella Box (for the month of April and May). Of course, I got excited and started seeing each item in them. And there I found, a gorgeous Fuchsia Pink tube which was Rimmel London Scandaleyes Show Off Mascara. So today, I am going to share my views on it with you all ;).


PACKAGING


This mascara originally comes in a thick cardboard kind of packaging with plastic cover on top of it. But as I got it in a subscription box, it came without that packaging (see in the picture below)


It has an eye catching bottle which is fuchsia pink in color and the name is written in quit bold letters. I love the packaging.


Its wand is also very different and interesting. The flat brush is to add volume to the lashes and the front round side to lift up the lashes in the end, which is something really good.


WHAT THE PRODUCT CLAIMS

Scandalous defined volume, lift + length
* Flat brush plumps, unique ball brush lifts and defines
* Show off lashes with no clumps!


PRICE

AUD 16.95/- for 12 ml
INR 500/- (approx) for 12 ml


AVAILABILITY

Australia - Easily available at Priceline, Myer, Chemist Warehouse
India - Its availability is really a problem in India. Right now I can only see it on Amazon.in but for Rs. 1145/- (which is way too expensive). Rimmel London products are available at Nykaa.com also. So check that out.


MY EXPERIENCE WITH THIS MASCARA

My first reaction when I applied this mascara was 'WOW'. Yes, it is that amazing. It makes my lashes so voluminous and also lifts them up which gives it the appearance of fake eyelashes (isn't it great?). The main thing I like about this mascara is that it doesn't make my eyelashes clumsy. All the lashes are well separated after applying it. So, it doesn't give me spider web kind of lashes.


You can easily see the difference between both my eyes in the picture above :)

 It is not waterproof which is not a good thing for a cry baby like me :D. But at the same time, it is not that bad as the non waterproof feature helps in taking off the mascara very easy at the end of the day. It does smudge a little, so not a great idea to apply it on the lower lashes on extreme hot days. Otherwise, it's a great mascara all year long.


PROS

* Very cute and attractive packaging
* Two types of brushes in one wand for different purposes
* Makes eye lashes voluminous 
* Lifts up the lashes and gives curl effect
* Does not make eye lashes clumsy
* Eye lashes are well separated
* Comes off easily with make-up remover
* Eyes appear fuller
* Pocket and travel friendly


CONS

* Not waterproof
* Smudges a little
* Not easily available in India


OVERALL VIEW

Even though it has some cons, still it is an amazing product to try out. I am really enjoying applying it and getting fuller lashes look without going for fake eye lashes. If you cannot find this particular mascara in India, try out some other Rimmel London mascara as they are really amazing. You can get one on nykaa.com at reasonable price.


RATING
4.75/5 


I hope this review was helpful for you guys. Share your thoughts in the comment section below. See you guys in my next post.

With Love
Akanksha


Sunday 12 June 2016

Canada Make-Up Haul June 2016

Hello Ladies...

I am really excited to write this post as I finally received my make-up products from Canada. Actually, my mum went to Canada for a month and I gave her a list of products that I wanted from there (you know make-up in Canada is cheaper than there in Australia and India). Just want to share my excitement with you all. And I will definitely give full reviews on these as soon as I use them :)


1. EYE SHADOW PALETTES


I got 2 eye shadow palettes. One is Urban Decay Naked Palette 1 which has warm tone neutral colours and the other one is Too Faced Chocolate Bon Bons which is sooooo cute that I had to get it :D

2. PRIMER AND STROBE CREAM


The primer I got is Smashbox Photo Finish Foundation Primer. I have heard so many good reviews on it so I thought to try it :). The other thing is MAC Strobe Cream which I wanted to try out for so long and finally got my hands on it.

3. CONCEALERS


My sister sent me NARS Radiant Creamy Concealer in the shade Ginger as she loves this one. Can't wait to try it out <3. The other one is MAC Studio Finish Concealer in the shade NW25. I already have NW35 shade in this which I use as a corrector. This one I will use as a highlighter ;)

4. LIPSTICKS


I got 2 MAC Lipsticks in shades Mocha (a peachy-brown colour) & Vegas Volt (an orangy-coral colour) and 2 Sephora Lipsticks in shades 5176B R15 (a light pink every day colour) & 5266A R61 (a pink coloured lipstick with brown undertones).

5. PRESSED POWDER


And the last one is MAC Select Sheer Pressed Powder in NC 25. I really like this face powder. I emptied one pack of it so I ordered this again :D

I loved all the products that my mom brought and my sister sent to me. Lots of love to them <3. Some great additions to my make-up collection :). I hope you guys also enjoyed this post. See you all in my next post.

With Love
Akanksha

Saturday 11 June 2016

Golden Black Smokey Eyes With Red Lips - A Wedding Make-Up Look

Hello Lovelies...

This post is dedicated to my lovelies who took the make-up lessons from me :). Thank you so much girls for believing in me :*. I hope you can now create all the looks from my blog. 

Today's look is appropriate for wedding functions which you can easily recreate yourselves now. If you like the look, then keep on reading ;)


PROCEDURE

I started with the eye make-up. I concealed my whole upper eye area with Maybelline Instant Age Rewind Concealer in the shade Medium and set it with a compact powder so that it does not crease.


After that, I applied Light Brown colour (1) from Freedom Pro Decandence Palette - Today's Tonight on my crease area and blended it well with a blending brush. 


Next, I took a metallic copper-gold colour (2) from the same palette and applied it on inner 3/4th part of eye lids with a flat brush. I kept applying it, till I got a good colour intensity. 


Then, I applied black eye shadow (3) and placed it on the outer 1/4th part of my eye lids. 


And then, I blended the crease area with the same blending brush till I got a smooth finish. I also blended the black eye shadow a little to make it look blended with the other eye shadow.
At the end, I applied a shimmery champagne-gold colour (4) on the same 3/4th part of eye lids where I applied copper-gold colour eye shadow.


After that, I started my base make-up by first applying moisturizer all over my face, followed by Natio Ageless Illuminating Primer. I completed my lower lash line make-up after completing the base make-up.

Next, I used MAC Studio Finish Concealer NW35 under my eyes i.e. on my dark circles and around my lips as a corrector to cancel out the darkness on these areas.


After that, I applied MAC Studio Fix Fluid Foundation NC37 (a high coverage foundation) all over my face using Real Techniques Face Expert Brush to get flawless finish. 

Then, I did some highlighting using MAC Pro Longwear Concealer NC35 (again a high coverage concealer). I applied it under my eyes in triangular form, on centre of my forehead, bridge of my nose, cupid's bow and centre of my chin. 


I blended the concealer using a damp Real Techniques Miracle Sponge to get a smooth finish and set the areas by applying MAC Studio Fix NC30 on highlighted areas.

After that, I contoured my cheeks, jawline and nose using Australi's AC ON TOUR Contouring and Highlighting Kit Dark Complexion and blended it really well.


After completing all this, I went back to my eyes and completed my lower lash make-up. For that, I applied black eye shadow on outer 3/4th part of lower lash line and on the inner 1/4th part, I used eye shadow No.2 from Freedom palette. On my inner corners of eyes, I used eye shadow No. 4, again from Freedom palette.
I made a winged eye liner using NYX Gel Liner in Black.
Then, I went ahead with Mascara on eye lashes and Kajal on my waterline.

After that, I used Maybelline Brow Master Palette in Deep Brown to do my eyebrows. I also used MAC Mineralised Skin Finish in the shade Nuanced on my cheekbones, centre of forehead, bridge of nose, cupid's bow and chin.

For Cheeks, I used a peach coloured blush from my Estee Lauder blush palette.

On lips, I, first applied MAC Ruby Woo Lipstick and on top of that I used NYX Soft Matte Lip Cream in Amsterdam. 

I sprayed MAC Prep + Prime Fix + at the end to give a glowy look to the face :)
And with that, the make-up is complete. Check out some more pics.


Hope you all liked this look. Tag me on Instagram or Facebook if you recreate it :*

Instagram - withloveakanksha
Facebook - With Love Akanksha

With Love
Akanksha