Showing posts with label mac ruby woo. Show all posts

Friday, 5 January 2018

Glittery Smokey Eyes With Red Lips ft. Stila Glitter Glow Liquid Eyeshadow

Hello Everyone...

Today, I am going to share the makeup deets for the look below. If you are interested in knowing what products I used to create this look then keep on reading the post.


Primer - Mac Strobe Cream + Benefit High Beam Illuminator 
Corrector - L.A. Girl Pro Conceal HD Concealer (Orange Corrector)
Foundation - Makeup Forever Ultra HD Foundation (Y245)
Concealer - Tarte Shape Tape Contour Concealers (Medium + Light-Medium Honey)
Cream Contour - L.A. Girl Pro Conceal HD Concealer (Beautiful Bronze)
Baking - Laura Mercier Loose Setting Powder (Translucent)
Powder Contour - Tarte Tartiest Pro Glow To Go Highlight & Contour Palette (Chisel)
Eyebrows - Nyx Tame & Fame Tinted Brow Pomade (Espresso)
Blush - Nyx Mosaic Powder Blush (Love)
Highlighter - Tarte Tartiest Pro Glow Highlight & Contour Palette (Burst)
Eyes - Kat Von D Shade+Light Eye Contour Quad (Plum)


Shade 1 - Used all over eye lids as well as blended well in the crease area.
Shade 2 - Used just on the crease area.
Shade 3 - Used on the outer corners and then taking slowly to the crease area while blending.
Used Tarte powder highlighter (Gleam) in the brow bone area.
Glitter Eyeshadow - Stila Glitter & Glow Liquid Eyeshadow (Smokey Storm)
Mascara - Too Faced Better Than S*x Mascara followed by Fake Eyeslashes
Lipstick - Mac Ruby Woo
Setting Spray - Mac Prep+Prime Fix+


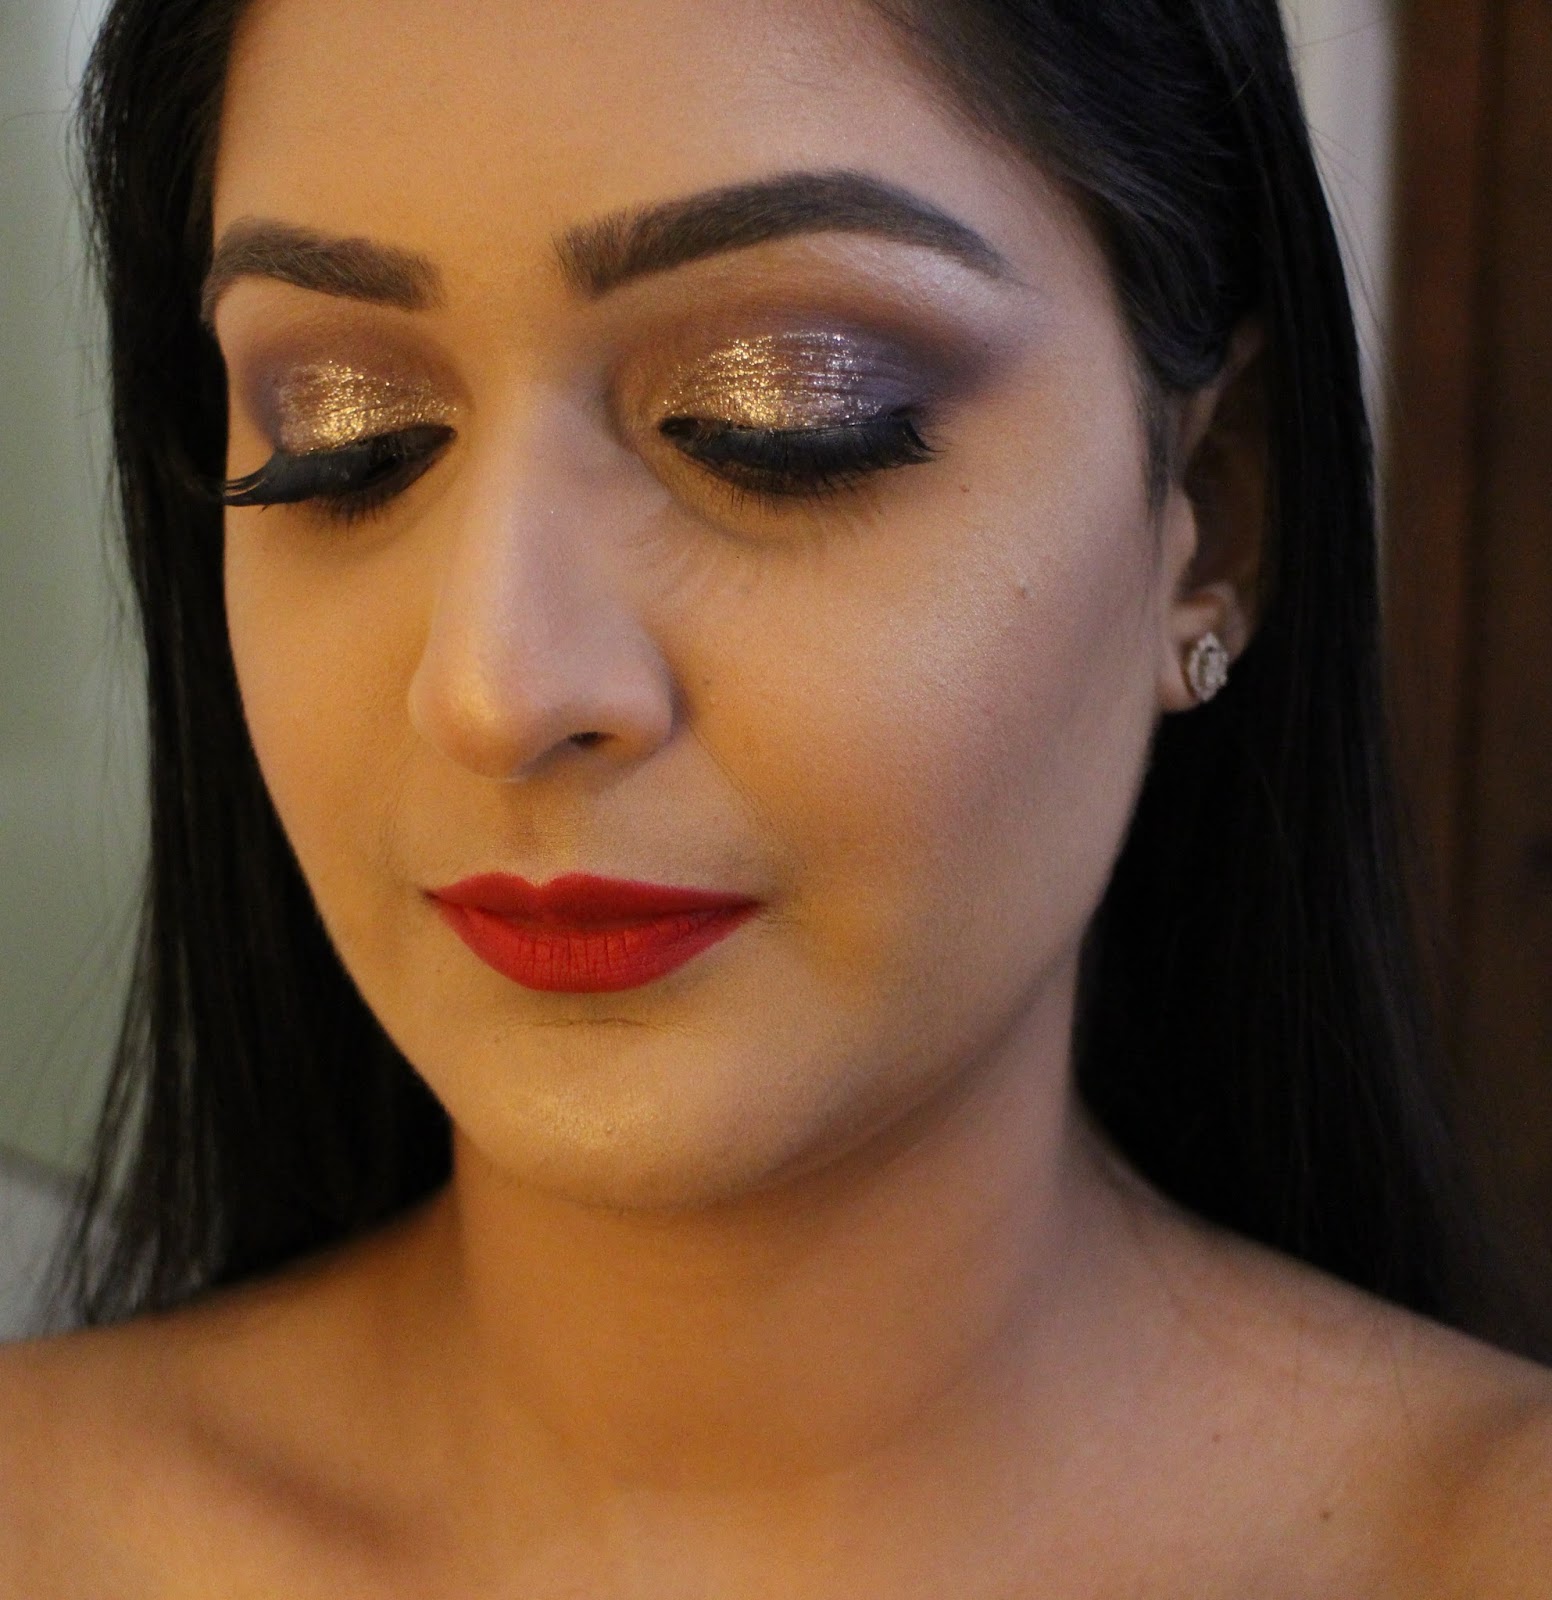


Hope the product information was helpful for you. I love all the products that I used in this look. This post was not step by step but will do some makeup looks soon with all the steps in pics. See you all in my next post. Till then, take care :) 

With Love
Akanksha


Tuesday, 18 October 2016

Karwachauth Make-Up Look 2016

Hey Everyone...

As Karwachauth is tomorrow, I created a classic Red Lips look for it as all I could think of was Red color only (for the traditional look). 


A very simple and classic make-up which is not so complicated and risky ;). If you liked the look, then keep on reading the post :).


PROCEDURE

Step 1 - I moisturized my face well and applied Smashbox Photo Finish Foundation Primer all over my face to prepare my skin for make-up.

Step 2 - Next, I applied Too Faced Born This Way Foundation in the shade Warm Beige all over my face and also on my neck with Real Techniques Face Expert Brush.

Step 3 - After that, I highlighted my under eye area, my forehead, bridge of nose, cupid's bow and chin using NARS Radiant Creamy Concealer in the shade Ginger. See the picture below for reference. Then, I blended it well using the same real techniques brush.


Step 4 - Next, I baked the highlighted areas using Chi Chi Real Minerals Finishing Powder to set the concealer perfectly and to get flawless finish. 


Step 5 - Then, I moved on to my brows. I used Maybelline Master Brow Pro Palette in the shade Deep Brown. First I used the wax from it to make my brows stay in place and then filled them up using the powder.

Step 6 - I started doing eye make-up next using Chi Chi Extravaganza Face Palette (see the picture below). I prepared my eyes with NARS Radiant Creamy Concealer to make a clean base for the eye makeup and set it with a face powder.


Taking the above picture for reference - in Step 1, I used eye shadow (1) from the Chi Chi palette and applied it on my crease area and a little above that using a blending brush and blended it well. 
In Step 2, I applied eye shadow (2) on the crease area using a blending brush and blended both the eye shadows well together.
In Step 3, I placed eye shadow (3) all over my eye lids with a flat eye shadow brush and taking the blending brush again, blended the crease area well to get a smooth finish.
Coming to the Step 4, I applied a winged liner using Bobbi Brown Gel Eye Liner in the shade Sepia Ink (brown color). 


For the lower lash line, I first applied eye shadow (1) using a blending brush, followed by eye shadow (2) again using blending brush.
Then I applied a thin line of Bobbi Brown Gel Liner in Sepia Ink on my lower lash line and smudged it well using a smudge brush to avoid to harsh lines.

I highlighted inner corners of my eyes using the highlighter from Chi Chi palette.
On my lower water line, I applied Lakme Eyeconic Kajal in the shade White to make my eyes look bigger. 


To complete the eye look, I applied false eye lashes and then applied Rimmel London Scandaleyes Show Off Mascara on my upper and lower lashes.

Step 7 - After the eyes, I sculpted my face by contouring the hollow of my cheeks, my jawline, and forehead using the Contour shade from Chi Chi palette (refer the palette picture) and blended it very well.

Step 8 - Then, I applied blush on my cheeks again from the Chi Chi palette.

Step 9 - After that, I highlighted my cheekbones, bridge of nose, forehead, cupid's bow and chin using the highlighter from Chi Chi palette.

Step 10 - Now comes the lips. It had to be MAC Ruby Woo ;).

To complete the look, I wore Red Bindi and Sindoor.


This look is perfect for day time. I hope you like this tutorial and try it on Karwachauth or other occasion :). See you all in my next post. Till then, take care :*

With Love
Akanksha